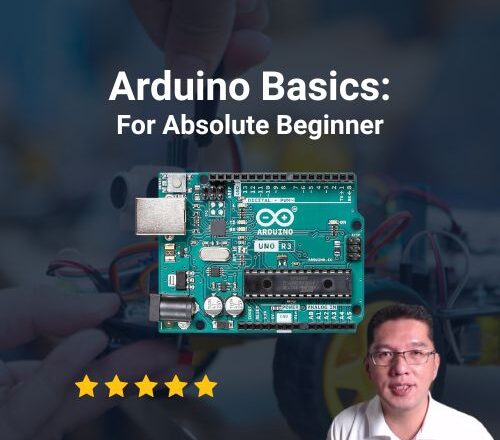
Arduino Basics for Absolute Beginner - English
- Description
- Curriculum
- Reviews
Welcome to the “Arduino Basics: For Absolute Beginners” course!
English Version
This course will take you to the very foundation of Arduino development boards: electronics and programming. That’s why in this course, we will not just talk about the Arduino board itself but we will also discuss the basics of electronics and programming.
In this course, we will combine these major elements as the key to understanding the Arduino development environment.
What You’ll Learn:
- The basics of electronics for Arduino environment
- The basics of the Arduino development board
- The basics of the C++ programming language for embedded systems
- Hands-on projects to learn by experience
By learning these elements combined, you will gain a deeper understanding of how the Arduino board works.
To maximize your learning experience, I have made these adjustments so you can learn better and faster:
- Basic English to minimize confusion with terminologies and jargon
- Every terminology will be explained
- The code will be explained together with the simulators
- Doing the actual projects is highly advised
- The teaching and coaching method is straightforward
- The instructor will not read scripts to better explain what is going on
- The sequence of discussions will be step-by-step
Parts and Tools You Will Need for This Course:
- A computer for writing programs (desktop or laptop)
- An internet connection for online simulators
- An Arduino Uno R3 Board
- An electronics parts list which you can download in this course
- A digital multimeter for testing (optional)
If you don’t have these parts and tools at the moment, don’t worry; we will use online simulators to get you started.
With this being stated, and if you are ready to start your journey into the world of automation and robotics, then let’s begin.
You can check out the previews of the video lessons in this course to get a heads-up on what to expect.
More projects will be added to this course later, so you will have more practice to do.
Let’s get started!
Who this course is for:
- Beginner with no Knowledge of Arduino and Electronics
- Course Refresher for People with Prior Knowledge
- For Electronics and Robotics Enthusiasts
- For Students who like to Learn Arduino Development Systems
- For Aspiring Computer Engineers and Electronics Engineers
How to Enroll in this course
You can click the “Get Course” button on this page and click “Add to Cart”
It will lead you to the “Cart Page” and to the Checkout Page.
You can pay via Gcash/BPI by submitting your payment reference number.
Account Name: Michael Tan
Gcash Number: 09386159179
BPI Account: 5806432956
Alternatively, you can pay via PayPal if you like.
You can contact us using the Chat Button Messenger.
You can also enroll through our Chat Messenger.
Enroll today and learn technology for our future!
-
1Rank 1A - To Whom is This Course For?Preview 6:18
If you are a hobbyist, an aspiring computer engineer, dreaming to become an inventor and innovator, then this course might be for you.
-
2Rank 1B - How this Course will Benefit You?Preview 5:45
If you would like to learn the foundation of Robotics, this course will help you, and uses simple English to explain terminologies and do actual projects.
-
3Rank 1C - How to Maximize Learning in this Course4:19
Learn how to maximize your learning experience throughout this course.
-
4Rank 1D - Can I Start without the Electronics Parts?3
-
5Rank 1E - What are the Preparations Needed for Actual ProjectsPreview 18:27
The list of parts and components will be updated as the course progresses.
-
6Rank 2A - Three Major Keys in Learning Arduino Systems Faster5:00
-
7Rank 2B - Why Learn Arduino?6:32
In this lesson, you will learn the reasons why we should learn Arduino, and how will it help us build our skills and develop our future.
-
8Rank 2C - What is an Arduino Board?15:20
In this lesson, we will learn what is an Arduino and the brief history behind it.
-
9Rank 2D - Arduino Uno R3 Parts and Specifications15:20
Let's learn the Parts of the Arduino Uno R3 and its specifications.
-
10Rank 3A - The Arduino Uno R3 Actual Board12:17
We will be seeing the actual Arduino Uno R3 board in this lesson.
-
11Rank 3B - What Powers Electronics Devices14:00
Let's learn what powers electronics devices.
-
12Rank 3C - The Difference Between Electricity and Electronics14:33
-
13Rank 3D - How Things Work in Electrical and Electronics19:24
In this lesson, we will discuss how things work in electrical and electronics systems
-
14Rank 4A - Introducing the Arduino Simulators10:50
In this lesson, we will learn how to use the Arduino Simulators available online.
-
15Rank 4B - The Basic LED Circuit14:01
Let's learn the Basic LED Circuit.
-
16Rank 4C - Simulating the Basic LED Circuit18:41
Let's simulate first how the Basics LED Circuit
-
17Rank 4D - The Actual Components for the Basic LED Circuit21:10
Let's see what the actual components for the Basic LED Circuit.
-
18Rank 5A - Building Our LED Circuit15:18
Let's build our LED Circuit.
-
19Rank 5B - What is Short Circuit?16:07
Let's learn about Short Circuit.
-
20Rank 5C - Simulating Basic LED with Switch15:12
Let's try to simulate the basic LED circuit with Switch.
-
21Rank 5D - LED Circuit with Switch Actual10:55
Let's build our LED with Switch in Actual!
-
22Rank 6A - Download and Install Latest Arduino IDE13:49
Let's download the latest IDE for Arduino.
-
23Rank 6B - The Arduino IDE Interface20:03
Let's learn how to use the Arduino Interface.
-
24Rank 6C - The Arduino LED Blink18:15
Let's check the Arduino LED Blink
-
25Rank 6D - Saving and Opening Files via Arduino IDE12:35
Let's learn how to save and open files via Arduino IDE
-
26Rank 7A - Project 1 Arduino Controlled LED Circuit26:31
In this lesson, we will start to build our first project using Arduino Uno R3
-
27Rank 7B - Project 1 Arduino Controlled LED Circuit Actual21:35
Let's see how things work in actual.
-
28Rank 7C - Project 2 Arduino Controlled LED with Switch33:40
Let's try and build a led controlled switch!
-
29Rank 7D - Project 2 Code Explanation22:02
Now, let's learn how the code works!
-
30Rank 8A - Project 3 Arduino LED with Potentiometer21:09
With the use of a potentiometer, let's control the LED!
-
31Rank 8B - Project 4 Arduino Controlled Buzzer14:25
Let's use a buzzer and control it using arduino!
-
32Rank 8C - Project 5 Arduino Buzzer with LED Function16:48
Let's add the LED to our Buzzer!
-
33Rank 8D - Project 6 Arduino Controlled Traffic Light17:57
Let's learn how to build a traffic light using Arduino Uno R3
-
34Rank 9A - Project 7 Arduino Traffic Light with Timer30:36
Let's add a countdown timer to our traffic light!
-
35Rank 9B - Project 8 Arduino Ultrasonic Alarm27:31
Like to use alarms for various purposes? Then this is it!
-
36Rank 9C - Project 9 LCD 16x2 I2C Welcome Message Screen37:30
Let's put in the display our messages!
-
37Rank 9D - Project 10 Arduino Temperature and Humidity Monitoring32:28
Let's build a temperature and humidity sensor!
-
38Rank 9E - Project 11 Automatic Temperature Fan Control53:44
Let's make an Automatic Fan using Temperature Control!
-
39Rank 10A - Arduino Panel Board Part I15:01
Let's start to build our Arduino Development Panel Board
-
40Rank 10B - Arduino Development Panel Board Part II18:08
Let's continue to build our panel board!
-
41Rank 10C - Arduino Development Panel Board Part III10:19
Let's continue to build our panel board!
-
42Rank 10D - Arduino Development Part IV07:53
Let's continue to build our Development Board!
-
43Rank 10E - Arduino Development Panel Board Part V11:49
Let's build our development board!


